【AWS】S3 アカウントリージョナルが実装されたので確認して見た
 【AWS】S3 アカウントリージョナルが実装されたので確認して見た
バケット名にアカウント固有のサフィックスを追加することで、自分のアカウントのリージョナル名前空間に予測どおりの名前を付けて汎用バケットを作成できます。
作成済みの環境を別のアカウントでコピーしよとするとバケット名重複でエラーになってたのでこれは助かる!
作成方法
1.AWS - S3 - バケットを作成
 2.「Account Regional Namespace」を選択し、作成

名前+アカウントID+リージョン+anのS3バケットが作成
※anはAccountregional Namespaceの略かな。

同じ名前をGlobalで作成しようとすると怒られます。。。

感想
便利そうだが今更感が。。。
【AI】cursor+gpt-4.1でブラウザで動作するオセロゲームを作ってみた

cursor+gpt-4.1でオセロゲームを作ってみた
準備
下記からcursorをダウンロードしインストール
www.cursor.com
実践!
cursorの右ウインドウがAIとの会話窓のため、ここからいろいろ指示をする。
「ブラウザで動作するオセロゲームを作りたい」
「CPU対戦機能を加えて」
などなど

ものの15分程度で下記が完成!
※いっさいコードには触っていない・・・


コードはこちら
※コードを同じフォルダに保存しindex.htmlをブラウザで表示すれば遊べます!
index.html
<!DOCTYPE html>
<html lang="ja">
<head>
  <meta charset="UTF-8">
  <meta name="viewport" content="width=device-width, initial-scale=1.0">
  <title>オセロゲーム</title>
  <link rel="stylesheet" href="style.css">
</head>
<body>
  <h1>オセロゲーム</h1>
  <div id="choose-side">
    <div style="margin-bottom:10px;">
      <span>CPUの強さ:</span>
      <label><input type="radio" name="cpu-level" value="strong" checked><img src="dragon.svg" alt="竜" style="height:1.5em;vertical-align:middle;">竜</label>
      <label><input type="radio" name="cpu-level" value="normal"><img src="dog.svg" alt="犬" style="height:1.5em;vertical-align:middle;">犬</label>
      <label><input type="radio" name="cpu-level" value="weak"><img src="mouse.svg" alt="ねずみ" style="height:1.5em;vertical-align:middle;">ねずみ</label>
    </div>
    <button id="choose-black">先手(黒)で始める</button>
    <button id="choose-white">後手(白)で始める</button>
  </div>
  <div id="cpu-image-container" style="display:none; text-align:center; margin-bottom:10px;"></div>
  <div id="board" style="display:none;"></div>
  <div style="text-align:center;">
    <button id="back-to-title" style="display:none; margin-top:20px;">最初の画面に戻る</button>
    <button id="reset-game" style="display:none; margin-top:20px; margin-left:10px;">リセット</button>
  </div>
  <script src="main.js"></script>
</body>
</html>
main.js
const BOARD_SIZE = 8;
const boardElement = document.getElementById('board');
const chooseSideDiv = document.getElementById('choose-side');
const chooseBlackBtn = document.getElementById('choose-black');
const chooseWhiteBtn = document.getElementById('choose-white');
const backToTitleBtn = document.getElementById('back-to-title');
const resetGameBtn = document.getElementById('reset-game');
const cpuLevelRadios = document.getElementsByName('cpu-level');
const cpuImageContainer = document.getElementById('cpu-image-container');

// メッセージ表示用divを追加
let messageDiv = document.getElementById('message');
if (!messageDiv) {
  messageDiv = document.createElement('div');
  messageDiv.id = 'message';
  messageDiv.style.marginTop = '20px';
  messageDiv.style.fontWeight = 'bold';
  boardElement.parentNode.appendChild(messageDiv);
}

// 0:空, 1:黒, 2:白
let board;
let currentPlayer; // 1:黒(人/CPU), 2:白(人/CPU)
let gameOver;
let playerColor = 1; // 1:黒, 2:白
let cpuLevel = 'strong'; // 'strong', 'normal', 'weak'

function getSelectedCpuLevel() {
  for (const radio of cpuLevelRadios) {
    if (radio.checked) return radio.value;
  }
  return 'strong';
}

function initGame() {
  board = Array.from({ length: BOARD_SIZE }, () => Array(BOARD_SIZE).fill(0));
  board[3][3] = 2;
  board[3][4] = 1;
  board[4][3] = 1;
  board[4][4] = 2;
  currentPlayer = 1;
  gameOver = false;
}

chooseBlackBtn.onclick = () => {
  playerColor = 1;
  cpuLevel = getSelectedCpuLevel();
  chooseSideDiv.style.display = 'none';
  boardElement.style.display = '';
  backToTitleBtn.style.display = '';
  resetGameBtn.style.display = '';
  showCpuImage();
  initGame();
  renderBoard();
  if (currentPlayer === 2 && !gameOver) setTimeout(cpuMove, 700);
};
chooseWhiteBtn.onclick = () => {
  playerColor = 2;
  cpuLevel = getSelectedCpuLevel();
  chooseSideDiv.style.display = 'none';
  boardElement.style.display = '';
  backToTitleBtn.style.display = '';
  resetGameBtn.style.display = '';
  showCpuImage();
  initGame();
  renderBoard();
  if (currentPlayer === 1 && !gameOver) setTimeout(cpuMove, 700);
};

backToTitleBtn.onclick = () => {
  chooseSideDiv.style.display = '';
  boardElement.style.display = 'none';
  backToTitleBtn.style.display = 'none';
  resetGameBtn.style.display = 'none';
  cpuImageContainer.style.display = 'none';
  cpuImageContainer.innerHTML = '';
  messageDiv.textContent = '';
};

resetGameBtn.onclick = () => {
  chooseSideDiv.style.display = 'none';
  boardElement.style.display = '';
  backToTitleBtn.style.display = '';
  resetGameBtn.style.display = '';
  showCpuImage();
  initGame();
  // 先手・後手の設定はそのまま
  if (playerColor === 2 && currentPlayer === 1) {
    renderBoard();
    setTimeout(cpuMove, 700);
  } else if (playerColor === 1 && currentPlayer === 2) {
    renderBoard();
    setTimeout(cpuMove, 700);
  } else {
    renderBoard();
  }
};

function renderBoard() {
  boardElement.innerHTML = '';
  for (let y = 0; y < BOARD_SIZE; y++) {
    const row = document.createElement('div');
    for (let x = 0; x < BOARD_SIZE; x++) {
      const cell = document.createElement('div');
      cell.className = 'cell';
      cell.dataset.x = x;
      cell.dataset.y = y;
      if (board[y][x] === 1) {
        const disk = document.createElement('div');
        disk.className = 'disk black';
        cell.appendChild(disk);
      } else if (board[y][x] === 2) {
        const disk = document.createElement('div');
        disk.className = 'disk white';
        cell.appendChild(disk);
      }
      cell.addEventListener('click', onCellClick);
      row.appendChild(cell);
    }
    boardElement.appendChild(row);
  }
  updateMessage();
}

function onCellClick(e) {
  if (gameOver) return;
  if (currentPlayer !== playerColor) return; // プレイヤーの手番のみクリック可
  const x = parseInt(e.currentTarget.dataset.x);
  const y = parseInt(e.currentTarget.dataset.y);
  if (board[y][x] !== 0) return;
  const flipped = getFlippableDisks(x, y, currentPlayer);
  if (flipped.length === 0) return;
  board[y][x] = currentPlayer;
  for (const [fx, fy] of flipped) {
    board[fy][fx] = currentPlayer;
  }
  nextTurn();
}

function nextTurn() {
  currentPlayer = currentPlayer === 1 ? 2 : 1;
  if (getAllValidMoves(currentPlayer).length === 0) {
    // パス判定
    if (getAllValidMoves(currentPlayer === 1 ? 2 : 1).length === 0) {
      // 両者とも置けない→終了
      gameOver = true;
      renderBoard();
      return;
    } else {
      // 相手も置けない→パス
      currentPlayer = currentPlayer === 1 ? 2 : 1;
      showPassMessage();
      renderBoard();
      if (currentPlayer !== playerColor && !gameOver) setTimeout(cpuMove, 700);
      return;
    }
  }
  renderBoard();
  if (currentPlayer !== playerColor && !gameOver) setTimeout(cpuMove, 700);
}

function cpuMove() {
  // CPUの手番
  const moves = getAllValidMoves(currentPlayer);
  if (moves.length === 0) return;
  let move;
  if (cpuLevel === 'weak') {
    // 弱:ランダム
    move = moves[Math.floor(Math.random() * moves.length)];
  } else if (cpuLevel === 'normal') {
    // 中:ひっくり返せる石が多い手を選ぶ
    let max = -1;
    let bestMoves = [];
    for (const [x, y] of moves) {
      const flipped = getFlippableDisks(x, y, currentPlayer).length;
      if (flipped > max) {
        max = flipped;
        bestMoves = [[x, y]];
      } else if (flipped === max) {
        bestMoves.push([x, y]);
      }
    }
    move = bestMoves[Math.floor(Math.random() * bestMoves.length)];
  } else {
    // 強:角優先、なければ中と同じ
    const corners = moves.filter(([x, y]) =>
      (x === 0 && y === 0) || (x === 0 && y === BOARD_SIZE - 1) ||
      (x === BOARD_SIZE - 1 && y === 0) || (x === BOARD_SIZE - 1 && y === BOARD_SIZE - 1)
    );
    if (corners.length > 0) {
      move = corners[Math.floor(Math.random() * corners.length)];
    } else {
      // 角がなければ中と同じ
      let max = -1;
      let bestMoves = [];
      for (const [x, y] of moves) {
        const flipped = getFlippableDisks(x, y, currentPlayer).length;
        if (flipped > max) {
          max = flipped;
          bestMoves = [[x, y]];
        } else if (flipped === max) {
          bestMoves.push([x, y]);
        }
      }
      move = bestMoves[Math.floor(Math.random() * bestMoves.length)];
    }
  }
  const [x, y] = move;
  const flipped = getFlippableDisks(x, y, currentPlayer);
  board[y][x] = currentPlayer;
  for (const [fx, fy] of flipped) {
    board[fy][fx] = currentPlayer;
  }
  nextTurn();
}

function showPassMessage() {
  messageDiv.textContent = (currentPlayer === 1 ? '白' : '黒') + 'は置ける場所がないのでパスします';
  setTimeout(updateMessage, 1200);
}

function updateMessage() {
  if (gameOver) {
    const [black, white] = countDisks();
    let result = '';
    if (black > white) result = '黒の勝ち!';
    else if (white > black) result = '白の勝ち!';
    else result = '引き分け!';
    messageDiv.textContent = `ゲーム終了 黒:${black} 白:${white} → ${result}`;
  } else {
    if (currentPlayer === playerColor) {
      messageDiv.textContent = (playerColor === 1 ? '黒(あなた)' : '白(あなた)') + 'の番です';
    } else {
      messageDiv.textContent = (playerColor === 1 ? '白(CPU)' : '黒(CPU)') + 'の番です';
    }
  }
}

// 8方向のベクトル
const directions = [
  [0, -1], [1, -1], [1, 0], [1, 1],
  [0, 1], [-1, 1], [-1, 0], [-1, -1]
];

function getFlippableDisks(x, y, player) {
  const opponent = player === 1 ? 2 : 1;
  let flippable = [];
  for (const [dx, dy] of directions) {
    let nx = x + dx;
    let ny = y + dy;
    let disks = [];
    while (
      nx >= 0 && nx < BOARD_SIZE &&
      ny >= 0 && ny < BOARD_SIZE &&
      board[ny][nx] === opponent
    ) {
      disks.push([nx, ny]);
      nx += dx;
      ny += dy;
    }
    if (
      disks.length > 0 &&
      nx >= 0 && nx < BOARD_SIZE &&
      ny >= 0 && ny < BOARD_SIZE &&
      board[ny][nx] === player
    ) {
      flippable = flippable.concat(disks);
    }
  }
  return flippable;
}

function getAllValidMoves(player) {
  let moves = [];
  for (let y = 0; y < BOARD_SIZE; y++) {
    for (let x = 0; x < BOARD_SIZE; x++) {
      if (board[y][x] === 0 && getFlippableDisks(x, y, player).length > 0) {
        moves.push([x, y]);
      }
    }
  }
  return moves;
}

function countDisks() {
  let black = 0, white = 0;
  for (let y = 0; y < BOARD_SIZE; y++) {
    for (let x = 0; x < BOARD_SIZE; x++) {
      if (board[y][x] === 1) black++;
      if (board[y][x] === 2) white++;
    }
  }
  return [black, white];
}

function showCpuImage() {
  let img = '';
  if (cpuLevel === 'strong') {
    img = '<img src="dragon.svg" alt="竜" style="height:48px;vertical-align:middle;"> <span style="font-size:1.2em;">竜</span>';
  } else if (cpuLevel === 'normal') {
    img = '<img src="dog.svg" alt="犬" style="height:48px;vertical-align:middle;"> <span style="font-size:1.2em;">犬</span>';
  } else {
    img = '<img src="mouse.svg" alt="ねずみ" style="height:48px;vertical-align:middle;"> <span style="font-size:1.2em;">ねずみ</span>';
  }
  cpuImageContainer.innerHTML = img;
  cpuImageContainer.style.display = '';
}

// 初期状態は選択画面のみ表示
boardElement.style.display = 'none';
chooseSideDiv.style.display = '';
backToTitleBtn.style.display = 'none';
resetGameBtn.style.display = 'none';

renderBoard();
style.css
body {
  font-family: sans-serif;
  text-align: center;
  background: #f0f0f0;
}
#board {
  display: inline-block;
  margin-top: 20px;
}
.cell {
  width: 40px;
  height: 40px;
  background: #2e8b57;
  border: 2px solid #333;
  display: inline-block;
  vertical-align: top;
  position: relative;
}
.disk {
  width: 32px;
  height: 32px;
  border-radius: 50%;
  position: absolute;
  top: 4px;
  left: 4px;
}
.disk.black {
  background: #111;
}
.disk.white {
  background: #fff;
  border: 1px solid #aaa;
}
<svg width="128" height="128" viewBox="0 0 128 128" fill="none" xmlns="http://www.w3.org/2000/svg">
  <circle cx="64" cy="64" r="60" fill="#aee9f7" stroke="#333" stroke-width="4"/>
  <ellipse cx="64" cy="80" rx="32" ry="24" fill="#fff" stroke="#333" stroke-width="3"/>
  <ellipse cx="64" cy="60" rx="28" ry="24" fill="#7fdc8a" stroke="#333" stroke-width="3"/>
  <ellipse cx="54" cy="60" rx="4" ry="6" fill="#333"/>
  <ellipse cx="74" cy="60" rx="4" ry="6" fill="#333"/>
  <path d="M64 84 Q64 92 72 92" stroke="#333" stroke-width="3" fill="none"/>
  <path d="M40 40 Q32 24 48 32" stroke="#333" stroke-width="3" fill="none"/>
  <path d="M88 40 Q96 24 80 32" stroke="#333" stroke-width="3" fill="none"/>
</svg>
dog.svg
<svg width="128" height="128" viewBox="0 0 128 128" fill="none" xmlns="http://www.w3.org/2000/svg">
  <ellipse cx="64" cy="80" rx="36" ry="32" fill="#fff" stroke="#333" stroke-width="4"/>
  <ellipse cx="44" cy="60" rx="10" ry="16" fill="#bfa77f" stroke="#333" stroke-width="3"/>
  <ellipse cx="84" cy="60" rx="10" ry="16" fill="#bfa77f" stroke="#333" stroke-width="3"/>
  <ellipse cx="64" cy="80" rx="24" ry="20" fill="#ffe4b5" stroke="#333" stroke-width="3"/>
  <ellipse cx="58" cy="80" rx="3" ry="5" fill="#333"/>
  <ellipse cx="70" cy="80" rx="3" ry="5" fill="#333"/>
  <ellipse cx="64" cy="92" rx="6" ry="3" fill="#333"/>
</svg>
mouse.svg
<svg width="128" height="128" viewBox="0 0 128 128" fill="none" xmlns="http://www.w3.org/2000/svg">
  <ellipse cx="64" cy="80" rx="36" ry="28" fill="#eee" stroke="#333" stroke-width="4"/>
  <ellipse cx="44" cy="60" rx="8" ry="14" fill="#ccc" stroke="#333" stroke-width="3"/>
  <ellipse cx="84" cy="60" rx="8" ry="14" fill="#ccc" stroke="#333" stroke-width="3"/>
  <ellipse cx="64" cy="80" rx="20" ry="16" fill="#fff" stroke="#333" stroke-width="3"/>
  <ellipse cx="58" cy="80" rx="2" ry="4" fill="#333"/>
  <ellipse cx="70" cy="80" rx="2" ry="4" fill="#333"/>
  <ellipse cx="64" cy="92" rx="4" ry="2" fill="#333"/>
  <path d="M100 110 Q120 120 110 100" stroke="#333" stroke-width="3" fill="none"/>
</svg>
README.md
# オセロWebアプリ メンテナンス用マニュアル・仕様書

## 概要
- ブラウザで動作するシンプルなオセロ(リバーシ)ゲームです。
- プレイヤー vs CPU(強さ3段階)で対戦できます。
- 先手・後手、CPU強さを選択可能。
- 盤面下に「リセット」「最初の画面に戻る」ボタンあり。
- CPU強さは「竜(強)」「犬(中)」「ねずみ(弱)」のイラスト付き。

## ファイル構成
- `index.html` … 画面レイアウト・UI
- `main.js` … ゲームロジック・UI制御
- `style.css` … 盤面や石の見た目
- `dragon.svg`, `dog.svg`, `mouse.svg` … CPU強さイラスト

## 主な仕様
### ゲームルール
- 8x8の標準オセロルール
- 石を置ける場所のみクリック可能
- 挟んだ相手の石を自動でひっくり返す
- 置ける場所がなければ自動パス
- 両者とも置けなければ終了・勝敗表示

### CPUの強さ
- 竜(強):角優先、なければひっくり返せる石が多い手
- 犬(中):ひっくり返せる石が多い手
- ねずみ(弱):完全ランダム

### UI
- ゲーム開始時に「先手/後手」「CPU強さ」を選択
- 対局中は盤面上にCPU強さのイラストとラベルを表示
- 「リセット」:現在の設定のまま新規対局
- 「最初の画面に戻る」:設定選択画面に戻る

## メンテナンス・カスタマイズ
- 盤面サイズやルール変更は`main.js`の定数・ロジックを修正
- CPUの思考ルーチンは`cpuMove()`関数を編集
- イラスト差し替えはSVGファイルを入れ替え
- UI文言やデザインは`index.html`と`style.css`で調整

## 動作環境
- モダンなWebブラウザ(Chrome, Edge, Firefox, Safari等)
- サーバ不要、ローカルで`index.html`を開くだけで動作

## 注意事項
- 画像ファイル(SVG)は`index.html`と同じディレクトリに配置
- JavaScriptの仕様変更時は動作確認を十分に行うこと

---
感想
昔1週間かけて挫折したのに、、、恐ろしい時代になった、、、(;・∀・)
【AI】ChatGPT Codexを使ってみた

ChatGPT Codexとは
自然言語から「実行可能な機能的コード(Functional Code)」を生成する能力に重さを置いた生成AI。codex-1を搭載した、多数のタスクの並行処理が可能なクラウドベースのエージェント。
2025/05/16に研究レビューとして公開され、2025/06/01現在、ChatGPT Pro、Team、Enterprise、Plusのユーザで利用可能。
ChatGPT Codexでできること
・コード生成・修正
・コード理解・Q&A
・テスト・ビルド・静的解析の実行 ※独立サンドボックス内でShellをたたくことが可能。そのためterraform validateやdocekr buildなどのコマンド実行が可能。
・GitHub PR生成・Git操作
・並列タスク実行
※コード生成・修正に特化してテストなどを行う環境があるというのが特徴かな。並列タスク実行はコンパイルなど時間がかかる処理があるアプリ担当はよいかもしれないがインフラ担当にはあまりメリットはないかも。( ̄д ̄)))
ChatGPT Codexと似たサービス
・Amazon Q Developer:AWS特化
・Google Gemini Code Assist:Googleが公式にVS Code向けプラグインを配布
やること
とりあえずChatGPT Codexを使ってみる。※使わにゃわからんので。
実践!
1.ChatGPT Codex接続
1-1.「ChatGPT」-「Codex」をクリック

1-2.「開始」をクリック

2.GitHubへ接続
2-1.「GitHubに接続する」をクリック

2-2.MFAを有効にする必要があるので「続行するには、MFA を有効にしてください」をクリック

2-3.「Authorize ChatGPT Connector」

2-4.接続するGitHubアカウントを選択

2-5.「Install & Authorize」

2-6.「GitHub 組織」、「リポジトリ」を選択後、「環境を作成する」をクリック

3.タスク実行
3-1.とりあえずデフォルトで表示されているタスクの実行をする。「タスクを開始」をクリック


・「コードの問題を修正するタスク提案」タスクでは修正が必要な箇所の表示と修正するためのタスクを表示してくれる!

「タスクを開始」してみる

問題個所を修正してくれた模様!

GitHubに反映させてみる。「プル リクエストを作成する」をクリック

「プル リクエストを表示する」をクリック

GitHubのプルリクの画面が表示される!

・「バグを見つけて修正する」ではPythonコードの不備が表示

・「新規参加者向けのガイド作成」ではガイドを作成してくれた!

ロードマップ
2025Q3:WebUIで見えているCodexタスクパネルをVS Codeサイドバーにそのまま移植
2026H1:モックAWS環境で実行し、差分ログを収集。Drift検出やDestroyリスクをAIが注釈
感想
コード全体を見るにはGitHub Codespacesを使うなりしないといけないのが不便。VS Codeで使えたらいいのだがまだ先の模様。。。
【AWS】Aurora DSQLについて調べてみた
 【AWS】Aurora DSQLについて調べてみた
紹介サイト
Aurora DSQLとは
PostgreSQL 互換のサーバーレス分散 SQL データベース で、読み取りも書き込みもリージョンをまたいでアクティブ-アクティブに処理しながら、ほぼ無制限にスケール し、99.99 %(単一リージョン)/99.999 %(マルチリージョン)可用性 を目指す新しい Aurora ファミリーのエンジン。運用者がインスタンス/シャードを意識する必要はなく、パッチ適用やスケールは完全に自動化されている。
従来のAuroraとの違い
1. アーキテクチャの違い
| 項目 | Aurora 従来版 | Aurora DSQL |
|---|---|---|
| エンジン設計 | インスタンスベース マネージド RDS の一部として、マスターインスタンス(書き込み)+リードレプリカ(読み取り)を AZ 内外に配置 Compute(インスタンス)とストレージを分離するものの、いずれもプロビジョニングされたインスタンス単位で動作 |
サーバーレス分散 SQL エンジン クエリ実行は Firecracker ベースのマイクロVM(Query Processor)がオンデマンドに起動/破棄され、トランザクションごとに並列実行 分散ジャーナル層とストレージ層がシャード化・分散化されており、Compute/Storage/IO が独立スケール |
| スケール方法 | インスタンスのスペック(vCPU・メモリ・IOPS)を手動または Serverless v2 で自動拡張 リードレプリカを追加すれば読み取り性能向上(書き込みはマスター限定) |
DPU(Distributed Processing Unit)単位の従量課金で、負荷に応じたマイクロVMが自動起動 リージョンをまたいで複数の QP(Query Processor)ノードが並列実行 シャーディング不要で水平分散が容易 |
| 障害時の耐障害性 | マスターインスタンス障害時はフェイルオーバーでリードレプリカを昇格 リードレプリカ障害時は冗長性低下(リードのみ影響) |
QP やジャーナルが障害を起こしても別ノードが即座にトランザクションを再実行 ストレージ層は 3 AZ 同期レプリケーション+マルチリージョン時は Witness リージョンを含むクォーラム構成で高可用性を確保 |
2. SQL 互換性・機能の違い
Aurora 従来版(MySQL/Aurora PostgreSQL)
- MySQL 互換版あるいは PostgreSQL 互換版のどちらかを選択可能
- 既存の MySQL/PostgreSQL ドライバ・エコシステムと 100% 同等に動作
- ストアドプロシージャ、トリガー、外部キー、ビュー、拡張モジュール(PostGIS など)など、元版エンジンの機能は基本的にすべてサポート
Aurora DSQL
- 現時点で PostgreSQL サブセット互換 のみ(MySQL 互換はなし)
- 未サポート機能
- 外部キー
- ビュー
- トリガー
- マテリアライズドビュー
- 拡張モジュールも一部制限あり
- トランザクション中に楽観的排他制御(OCC)でコミット時に競合チェックを行うため、長時間の大規模バッチや大量一括更新時はリトライが発生しやすい
3. スケーリング・パフォーマンスの違い
Aurora 従来版
- 読み取りスケールはリードレプリカ追加で改善
- 書き込みはマスターインスタンス1台に依存
- Serverless v2(MySQL/Aurora PostgreSQL 両対応)ではインスタンスサイズ(ACU:Aurora Capacity Unit)がミリ秒単位で自動拡張可能
- 水平シャーディングは行わず、あくまで同一インスタンス内でのリソース増減
- 継続的に高負荷がかかる OLTP ワークロードやマルチリージョン書き込みには限界がある
Aurora DSQL
- リージョンをまたいだ複数の QP(クエリ実行ノード)がアクティブ‐アクティブで動作し、書き込みもあらゆるリージョンから同時に可能
- ストレージも自動でシャード化・スケールアウトされるため、極めて大規模なトランザクション処理が可能
- コミット時の OCC 検証を採用しており、読取レイテンシは低めだが、同一行を同時更新すると再試行コストが発生
- 小さく短いトランザクションを大量に捌く OLTP に最適化
4. 料金モデルの違い
Aurora 従来版
- インスタンス単位の課金(vCPU・メモリ・I/O)
- ストレージ使用量:月額 0.10~0.125 USD/GB・月(リージョンによる)
- IO 操作量課金:およそ 810 μUSD/1 万 IO リクエスト
- Serverless v2 は ACU(Aurora Capacity Unit)単位での従量課金
- 例:2 ACU × 使用時間 + ストレージ
- リードレプリカを多数使うとインスタンス費用が合算される
Aurora DSQL
- 完全サーバレス&DPU(Distributed Processing Unit)単位の従量課金
- 例:米国東部リージョンで $8/100 万 DPU、ストレージ $0.33/GB-月
- 毎月最初の 100k DPU および 1 GB ストレージは Free Tier
- DPU 消費量はクエリの「重さ」や同時実行数に依存
- 低負荷時はほぼ課金ゼロ、負荷が上がるとリニアに増加
- インスタンス台数を意識せず、自動で柔軟に拡張・縮退
5. ユースケースの違い
Aurora 従来版 が向いているケース
- 単一リージョン内での高パフォーマンスな OLTP/OLAP
- MySQL または PostgreSQL と 100% 互換性が必須、既存アプリからの移行コストを極力抑えたい
- 読み取りがメインで、書き込みはプライマリのみ、Global Database を使ったリードレプリカによるマルチリージョン読み取り
- 拡張機能(PostGIS、論理レプリケーション、ビュー、ストアドプロシージャ、トリガーなど)を多用する
Aurora DSQL が向いているケース
- グローバルに分散したアクティブ‐アクティブ書き込みが必要(例:グローバル SNS、オンラインゲーム、マルチリージョン決済システム)
- 小さいトランザクションを非常に高い同時実行でさばきたい OLTP ワークロード
- インフラ運用を極力省きつつ、秒〜分単位でスケールアウト・スケールイン要件がある
- シャーディング不要でマルチリージョン展開を検討しており、可用性 99.999%(マルチリージョン構成時)を求める
6. 構築・運用面の違い
Aurora 従来版
- コンソールまたは CloudFormation/Terraform でクラスタを作成し、インスタンス数やインスタンスタイプ(vCPU・メモリ)を選択
- メンテナンスウィンドウでのパッチ適用、リソース変更(インスタンスサイズ変更)はユーザーが設定・実施
- バックアップはストレージに自動的にスナップショットが取得され、復旧ポイントを保持
- リードレプリカや Global Database などのオプション構成は比較的簡単だが、各インスタンスの台数や種類を意識する必要がある
Aurora DSQL
- クラスタ作成時に「リージョン/PostgreSQL バージョン/シングル or マルチリージョン」を指定するだけで、DPU やシャード数などを意識せず自動プロビジョニング
- メンテナンスやスケーリングは AWS 側が完全にハンドリング
- アプリケーション接続は PostgreSQL ドライバ(libpq、psql、ORM など)を使い、エンドポイントに接続するだけ
- エラスティックかつアクティブ‐アクティブ:リージョン間フェイルオーバーを AWS が自動的に管理し、運用負担は非常に少ない
7. 制約・注意点の違い
Aurora 従来版
- フル互換エンジンのため、大抵の PostgreSQL/MySQL 機能はそのまま利用可能
- 書き込みスケールは単一マスターに依存するため、ワークロード急増時はインスタンススペックやレプリカ数の調整が必要
- マルチリージョン
Auroraとはコンソールを分けている模様


【Windows】Windows Insiderとは
【Windows】Windows Insiderとは
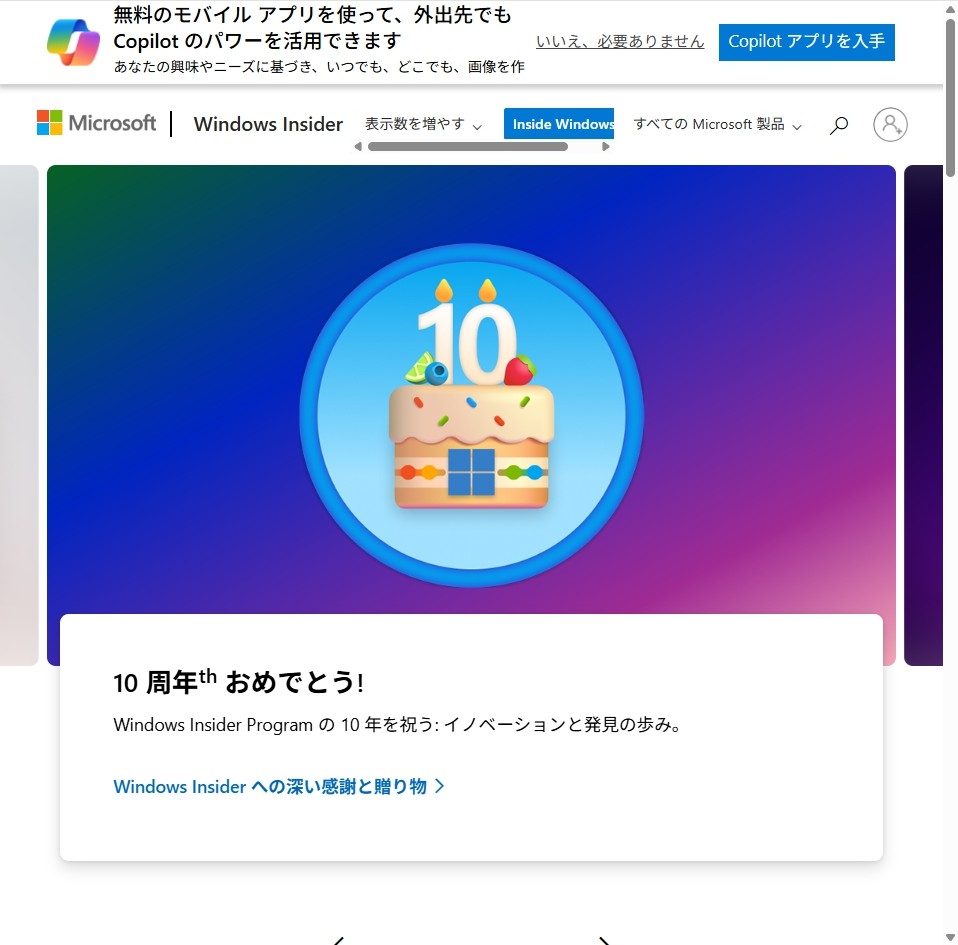
よくMicrosoftのアップデートを見ると「Windows Insider向けに配布開始」などとあるがWindows Insiderなんてみたことないと思ったので調べてみた。
こちらのサイトですね。
www.microsoft.com
ちょうど10周年らしい。
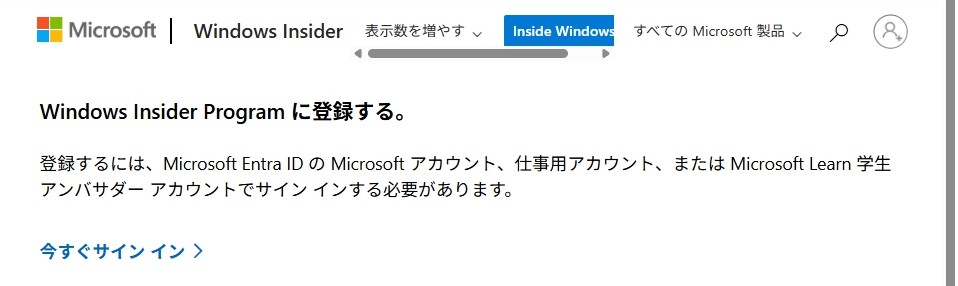
登録が必要な模様
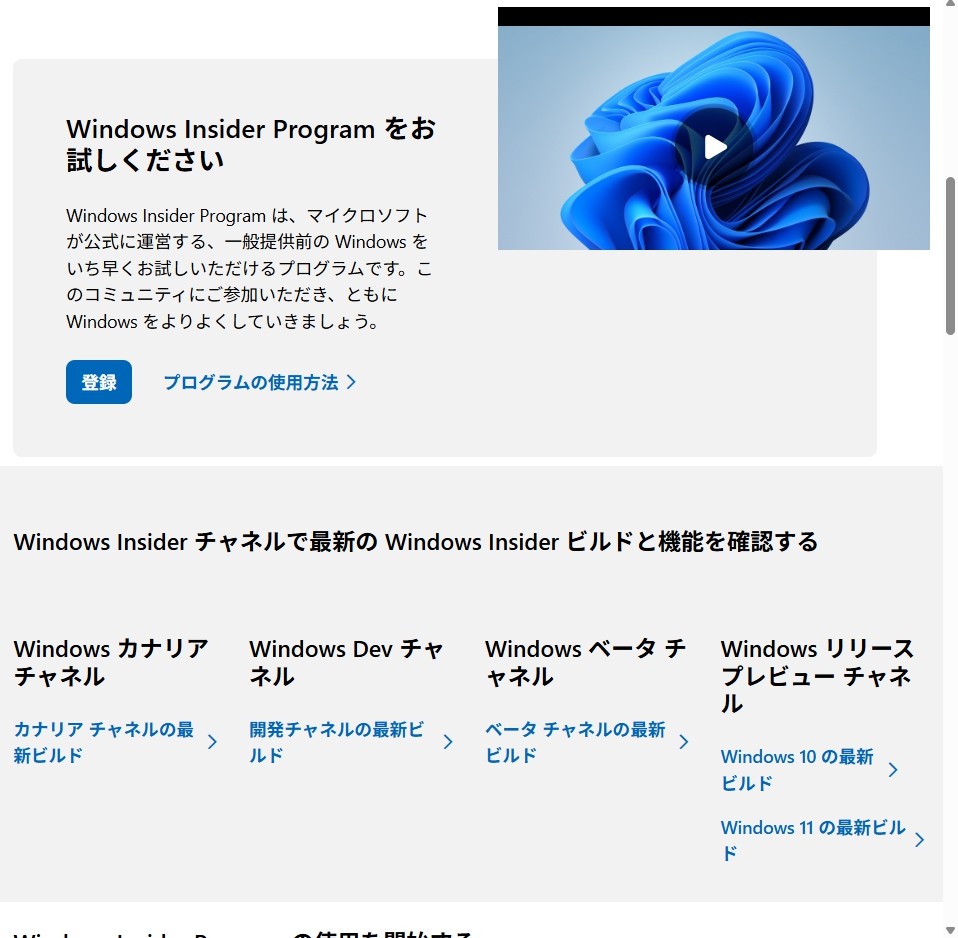
いっぱしのIT屋さんなので登録してみる
なにやら開始できるらしい

OSをInsider Preview版に変える必要がある模様

不安定なものはいれたくないので仮想マシンにインストールしてみる

そんなページはないと言われた。。。

感想
まぁなんとなくやれそうなことが分かったのでよし!


【AWS】VSCodeでAmazonQを便利に使う

VSCodeでAmazonQを便利に使う
1.インストール時は左側にアイコンがあり、コードエクスプローラとかぶるので右側に移動させる。

1-1.AmazonQのアイコンを右クリックし、「移動先」→「セカンダリサイドバー」

これで右側に来るのでコードエクスプローラと同時表示が可能になる。

2.指示してみる
ファイルが全くないのでプロファイルを指定したTerraformファイルの作成を依頼
勝手にS3を作成している模様。。

S3不要でAPIGateway+Lambda(python)で200OKを返すものを作成するよう指示してみた。

コードを書き換えてくれてその後のやり方も教えてくれる。便利!

terraform planでエラーが出たので修正指示。

terraform コマンドをアップデートしたいようなので「Run」

いちいちplanするのも面倒なのでplanも指示してみた。「Run」で。

いくつか勝手に修正してplanで問題ないところまでもっていってくれる!

実際planしてみると通る!


動作確認もばっちり!

感想
コードを一切触らずここまでできた。AIやばし